

I decided my next papercraft will be in my "3D shooter" series again: Duke Nukem! 😎
And as always, to make a papercraft model from an actual video game model, you need to have the actual game; and here I ran into the same issue for Duke Nukem as I had with Doom: the original, iconic Duke Nukem 3D game isn't actually truly 3D, and has no 3D characters models to extract...!
So instead, I chose a different Duke Nukem game, with a 3D style that would match my other 'early First Person Shooter' papercrafts of Quakeguy, Unreal Prisoner 849 and Doomguy: Duke Nukem Manhattan Project!

1) Unpacking Duke Nukem Manhattan Project's game archives (any ZIP-file manager)
- As you can see, I'm using the CD-ROM version of Duke Nukem Manhattan Project; I haven't checked, so I can't be 100% sure, but I think digital PC versions will probably work the same way as long they use the same file types as the CD-ROM version...?
- Just like most games, the actual game files like the 3D models are stored in compressed game archives that need to be unpacked first to work with the files inside.
- For Duke Nukem Manhattan Project, the game archives have a .zipfs file extension and on the PC CD-ROM version, they can be found in the Program Files -> Duke Nukem - Manhattan Project -> duke -> base subfolder.
NOTE: If you have a digital version, you can probably find the .zipfs game archives in the same subfolder in the Duke Nukem Manhattan Program Program Files folder on your computer after installing the game.
(- I like to copy the files that I will need to a separate New folder so I can keep everything together and easily find everything.)
- Duke Nukem Manhattan Project is divided into 8 episodes and there's a .zipfs archive for each of them: db_e01 through db_e08 (you don't really need to copy the db_cor.zipfs core archive, since it doesn't have any 3D models or anything else of interest for us).
- Fortunately, just like with Quake III Arena, the game archives are pretty much just renamed .ZIP files so you don't need any special tools for this step: just change the file extension from one of the episode .zipfs files to just .zip.
- Now you can use your favorite standard ZIP-file manager to unpack the compressed archives (if you don't already have one, you can find many free ones online, like the popular 7-Zip).


2) Opening and extracting Duke Nukem Manhattan's 3D models (Granny Viewer + XLTractor)
- Inside the game archives are the actual game files including the 3D models and animations.
- For Duke Nukem Manhattan Project, these come as .grn files and to open them, we need a special tool: Granny. 👵
NOTE: The Granny 3D SDK is a professional Software Development Kit created by RAD Game Tools and it is very expensive! (especially if you just want to export a 3D model to make it into a papercraft 😋)
However, there is a Granny Viewer version available which is free to use, but because it doesn't have the Export function that the full Granny 3D SDK has, we will have to use a workaround:
- The free Granny Viewer used to be on the RAD Game Tools website, but unfortunately it seems to be gone from the live site now... Luckily, you can still download old versions from the official website using the Wayback Machine:
NOTE: The Wayback link above for May 9th, 2008 will let you download Granny Viewer 2.7.024 which worked for me. You can try different versions of course, but I couldn't get the Duke Nukem Manhattan Project Granny files to open in newer versions... 😟
- Install Granny Viewer 2.7.024 that you downloaded from the Wayback Machine link.


- Like I said, the Granny Viewer doesn't have an Export function and we need another tool to capture the 3D models while viewing them in Granny Viewer: XLTractor (which we also used for Escape From Monkey Island in a similar way 😉)
- GLXtractor by Alexander Kaspar is actually a graphical user interface (GUI) frontend for Eyebeam OpenLab's OGLE which will do the actual capturing; the GLXtractor download includes the OGLE tool and basically makes configuring it a whole lot easier.
- Download GLXtractor V 0.9.9 from the "Downloads" sections from an archived version of Alexander Kaspar's website:
- Unzip the GLXtractor ZIP-file.
- In the new GLXtractor folder, right-click on the GLXtractor.exe executable file and select Run as administrator.
NOTE: the GLXtractor tool needs to temporarily copy some files to the Granny Viewer file Program Files folder, and in newer versions of Windows it needs Administrator rights to do this!
GLXtractor zip Run GLXtractor as administrator
- Make sure GLXtractor is running under Administrator mode and then first, click the Ogle Plugin tab and check the Capture Texture Coords box (this way the captured 3D models will preserve the UV coordinates which tells your 3D software how the texture images whould be applied to the 3D model so the textures will look correct).
- Then go to the first Capture tab and click the Choose App button, browse to the Program Files (x86) -> Granny Viewer installation folder, and choose the gr2_viewer.exe executable as the OpenGL application you want to capture from.
- On the Capture tab, also make sure the Capture Textures box is checked and be sure to make a mental note of the folder where the captured files will be saved and of the Capture Shortcut key combination (by default it will be ctrl+shift+f).
- Now you can finally click the Start Application button to start Granny Viewer!


3+4) Working with Granny Viewer and extracting the 3D models with GLXtractor
- NOTE: If you forget to right-click and Run the GLXtractor tool as administrator, you will be presented with an error message when you click the Start Application button:

- If you did do it correctly though, Granny Viewer will start and run through the GLXtractor when you click the Start Application button.
- Now in Granny Viewer, make sure you can see the Files menu options on the left (click the Back to Main Menu button at the top and then the Files button if you can't).
- Click the Load File... button and then browse to where you unzipped the compressed Duke Nukem Manhattan Project game archives;
- I wanted to extract Duke's 3D model, so I chose the db_e01 -> models -> e01 -> player folder.
IMPORTANT NOTE: The base model for Duke is only in the db_e01 folder; the base models for the enemies/monsters are spread throughout the 8 episodes.
IMPORTANT NOTE 2: at first in newer Granny Viewer 2.x.xxx versions, you will see nothing to select, this is because by default, it only looks for newer Granny 2 Run-time Files (*.gr2). Duke Nukem Manhattan Project is an older game and uses Granny 1 Run-time Files: .grn.
- To fix this, click the Granny 2 Run-time File dropdown box, change it to All Files (*.*) and you will be able to see all the Duke Nukem Manhattan Project files in the folder, including the .grn ones.
NOTE: the way the 3D models work in Duke Nukem Manhattan Project, is that there is one .grn base model in a standard pose, and the rest of the .grn files are all the different animations in the game that can be assigned to that base model.
- Click the button to Open the duke.grn base model first.


- Finally, your first look at 3D Duke! 😃 The base model will open in its default pose, but you can open an animation file to capture the 3D model him in a more interesting pose.
- To do so, click the Load File... button again, change the Granny 2 Run-time File dropdown box to All Files (*.*) again and then click the button to Open any other .grn file (the .grn animation files all have a very recognizable name, like duke_crouch.grn, duke_stand.grn., etc. so you will have a good idea what the pose in the animation will be like 😀)
NOTE: you can even choose a duke_xxx.grn animation file from another episode which work fine with the duke.grn base model from episode 01; you can also even select a .grn animation file from a completely different character, but that can result in some... 'weird' poses for Duke... 😉
- After you have Loaded a .grn animation file for Duke, not much seems to have changed; if you go to the Animation List tab in Granny Viewer however, you will now see two Animations: the base one, and the one you just Loaded.
- Click on the image of the animation you want, and the preview window will change to Duke in that pose.
- Now you can finally press the GLXtractor Capture Shortcut keys (Ctrl+Shift+f by default) to capture the 3D model. 😀
NOTE: You can do several captures in a row, but GLXractor will only save the captured models to the capture folder after you close the application that they are captured from!
- Close the Granny Viewer program, and GLXtractor will create a Wavefront .obj file for each capture in the Folder you specified in the on the Capture tab when setting up GLXtractor to run Granny Viewer.
(- The temporary files that GLXtractor copied to the Granny Viewer Program Files folder wil be deleted automatically since they are no longer needed by GLXtractor).
- By default, the capture folder will by your My documents folder, in a subfolder called Xtracted -> gr2_viewer.


05) Checking the 3D model and getting the textures
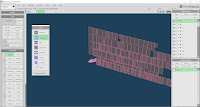
- When you Open the captured Wavefront .obj file in a 3D program (I like to use Metasequoia (don't flip right and left and don't Invert V of mapping when opening captured Duke Nukem Manhattan Project .obj models this way) at first glance all you can see is a whole lot of squares!? 😟
- If you zoom in on the bottom left square however, you will see that there was indeed a 3D character model captured.
- In fact, you will see there are actual several 3D character models captured; delete the captured 3D models you don't want (including the strange quares) except the one you want to keep.
- Increase the scale so the 3D model will be easier to work with.


- Now to get the textures; luckily in this case, they aren't very hard to find or access. 😊
- The textures are simply saved as standard .bmp image files and you can find them easily in the same unzipped db_e.. game data folder where you got the base model.
- For Duke, you will find two versions of his main body texture and one for the ammunition belts and pockets and Duke Nukem belt buckle (the other textures are for ingame effects that you won't need for a papercraft model).
- Because you told GLXTractor to Capture the Texture Coords in the OGLE Plugin tab in the settings when starting Granny Viewer, you can now create two different materials for the 3D model in your preferred 3D program, assign the correct textures, and 3D Duke Nukem will get its color back!
- Of course you can do the same for any weap(on) or any (enemy/)monst(er) 3D model and remodel it to make it into a new 3D Duke Nukem papercraft! 😀


Stay tuned! 😀
Tools used:
- Any Zip-file manager really (you probably already have one installed on your computer, but if you don't, there are many free ones available like the popular free 7-Zip): https://www.7-zip.org/
- Granny Viewer 2.7.0.24 by RAD Game Tools (if you're having trouble, make sure you have the correct version!):
- GLXtractor V 0.9.9 by Alexander Kaspar:
Addendum / summary:
+ The Duke Nukem Manhattan Project .zipfs compressed game archives for each of the game's eight episodes are actually just .zip files:
- Change the file extension to .zip and unpack them with any basic ZIP-file archiver.
+ In the unpacked .zipfs game archives is a folder called models with .grn 3D models and animations:
- There is one base .grn for each 3D model (in the first episode they appear).
- The other .grn files are animations for the base model.
- The player folder has Duke's base model and animations.
(- Only the first episode's game archive (db_e01.zipfs) has the Duke base model.)
- The monst folder has the monsters / enemies.
- The weap folder has Duke's weapons.
- You can assign .grn animations to other .grn base models but the end results may be... weird.
+ To extract the Duke Nukem Manhattan Project 3D game models, set up the Granny Viewer to run through the GLXTractor:
- Then open a .grn base model in Granny Viewer and load a .grn animation.
- Press the GLXTractor Capture Shortcut keys (Ctrl+Shift+f by default).
- Close Granny Viewer and open the Wavefront .obj file that GLXTractor captured.
- Find the matching .bmp texture image in the episode's .zipfs archive.
- Assign the texture image to the 3D model.
No comments:
Post a Comment