Showing posts with label LEGO. Show all posts

Monday, October 31, 2022

free Halloween 2022 LEGO Castle Fright Knights Basil the Batlord papercraft release!


Another year, another Halloween! 🎃🙂 This year, I decided to finally make a papercraft Basil the Batlord 'mini'figure (he's about 27,5 cm tall) from the 1997-1998 LEGO Castle Frights Knights 🦇 theme.

Get the parts and instructions to build your own free papercraft Bat Lord Basil
(and lots more!) from my papercraft webpage:


Have fun building and enjoy a spoooooky Halloween! 👻

Saturday, May 21, 2022

Spot the differences - free papercraft LEGO Imperial Soldier and Guard release! :o)


It's two new papercraft releases at once! (spoiler: it's really just a color change of course) 😉


Download + build your own free papercraft LEGO minifigs (+lots more!)
from my papercraft webpage:


Have fun building!

Saturday, May 14, 2022

free papercraft LEGO Imperial Soldier & Guard minifigs WIP 4


You might think I made all the parts double, but I really didn't need to of course. 😉


Just like real LEGO minifigures, the papercraft ones can be taken apart and all the parts can be  mixed and matched. So I could use the legs, hands, head and backpack and saber from earlier papercraft minifigures to make two of them like this!

The papeercraft Soldier and Guard are pretty much done (obviously), so hopefully I'll find the time to  finish the instructions (I'll just make those only once too, since the only difference is just a color change) take some pictures and make some silly release video. 😁

Stay tuned!

Saturday, May 7, 2022

free papercraft LEGO Imperial Soldier & Guard minifigs WIP 3: looking smart! :o)


I think the Imperial Soldier might even look smarter than the 2020 Christmas Toy Soldier!

I didn't really need to test build it, since I already made most of the parts before, so I already did the final build. 🙂

Stay tuned!


Wednesday, April 27, 2022

LEGO Imperial Soldier & Guard minifigs WIP 2: Did the Toy Soldier join the Imperial forces...??


Like I said, really the only new part that I need to make the LEGO Pirates Imperial Soldiers and Guards are the flags, and as you can see, it's not a very difficult part to make.


It went together very easily, and in fact the Toy Soldier liked it so much that it eh... confiscated the test build... 😁

Stay tuned!

Saturday, April 23, 2022

LEGO Imperial Soldier & Guard minifigs WIP 1: you really think changing to red shirts is a good idea...?


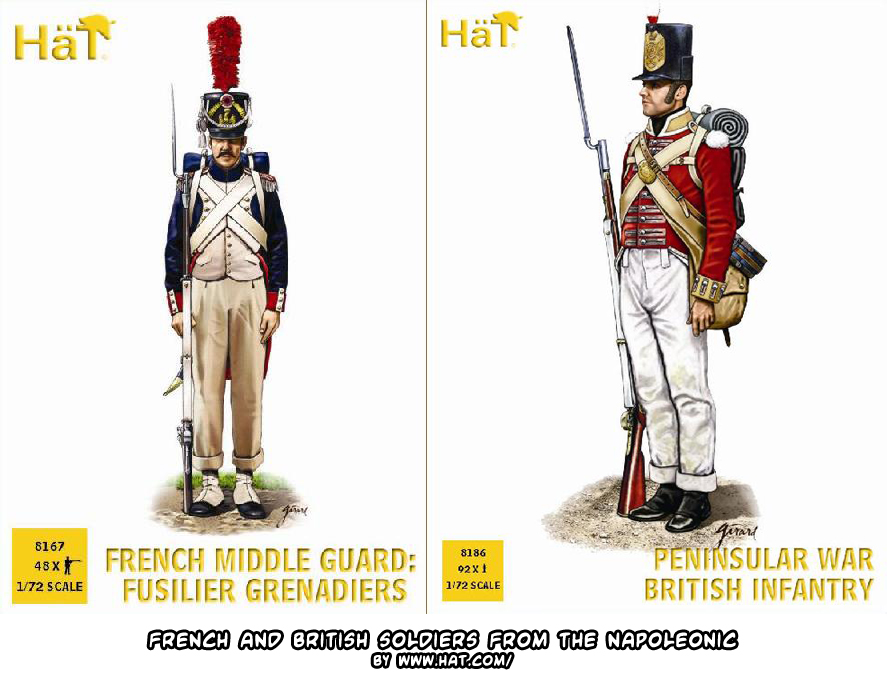
You should know that the classic Pirates is one of my favorite LEGO themes! Right from the start in 1989, the Pirates were opposed by the Imperial Soldiers, led by Governor Broadside, well-disciplined and dressed in stylish blue and white uniforms that I always felyt like they were modelled after Napoleon's  soldiers (although there were many variations and lots of nations with similar colors and uniforms etc. in that era).

Later on in 1992, the Imperial Soldiers in their blue colors were slowly phased out by the Imperial Guards, which had changed their uniforms to red shirts instead (or the British "Redcoats" from the American Revolutionary War). Something tells me the Imperial Guards didn’t consult with any Star Trek fans before making this change... 😋


Coincidence...?

As for making the papercraft versions of the minifigs, I actually already made most of the pieces for other minifigs already, I just have to recolor them:
  • Flintlock rifle and shako hat: I already made both these parts for the Toy Soldier minifig (link) I made for Christmas 2020. I just have to the color the hat all black. 😊
  • Head: the heads are just the clean-shaven "Standard Grin" version like for the M:Tron astronaut: link (and basically all LEGO minifigs before the Pirates appeared in 1989 🙂)
  • Backpack: I already made it for the 'fake' Indy minifig I created myself before LEGO came up with a real Indiana Jones theme: link 😉
  • Epaulette: the Imperial Soldiers wear blue epaulettes and the Imperial Guards red ones,, and I already have brown ones (and yellow ones: link) before so it'd be another color change.
  • Torso, arms and legs: I can use the white torso and legs from the Ghost minifig: link (adding the blue/red shirt patterns of course) and the red and blue arms from the Forestmen: link
Really only the new part will be the 2 x 2 flags for their rifles:


And if you look closely, you'll start recognizing a French "Fleur de lis" on the Imperial Soldiers' flag, and a British Crown on the Imperial Guards' one.

Coincidence...? 😉

Stay tuned!

Saturday, July 10, 2021

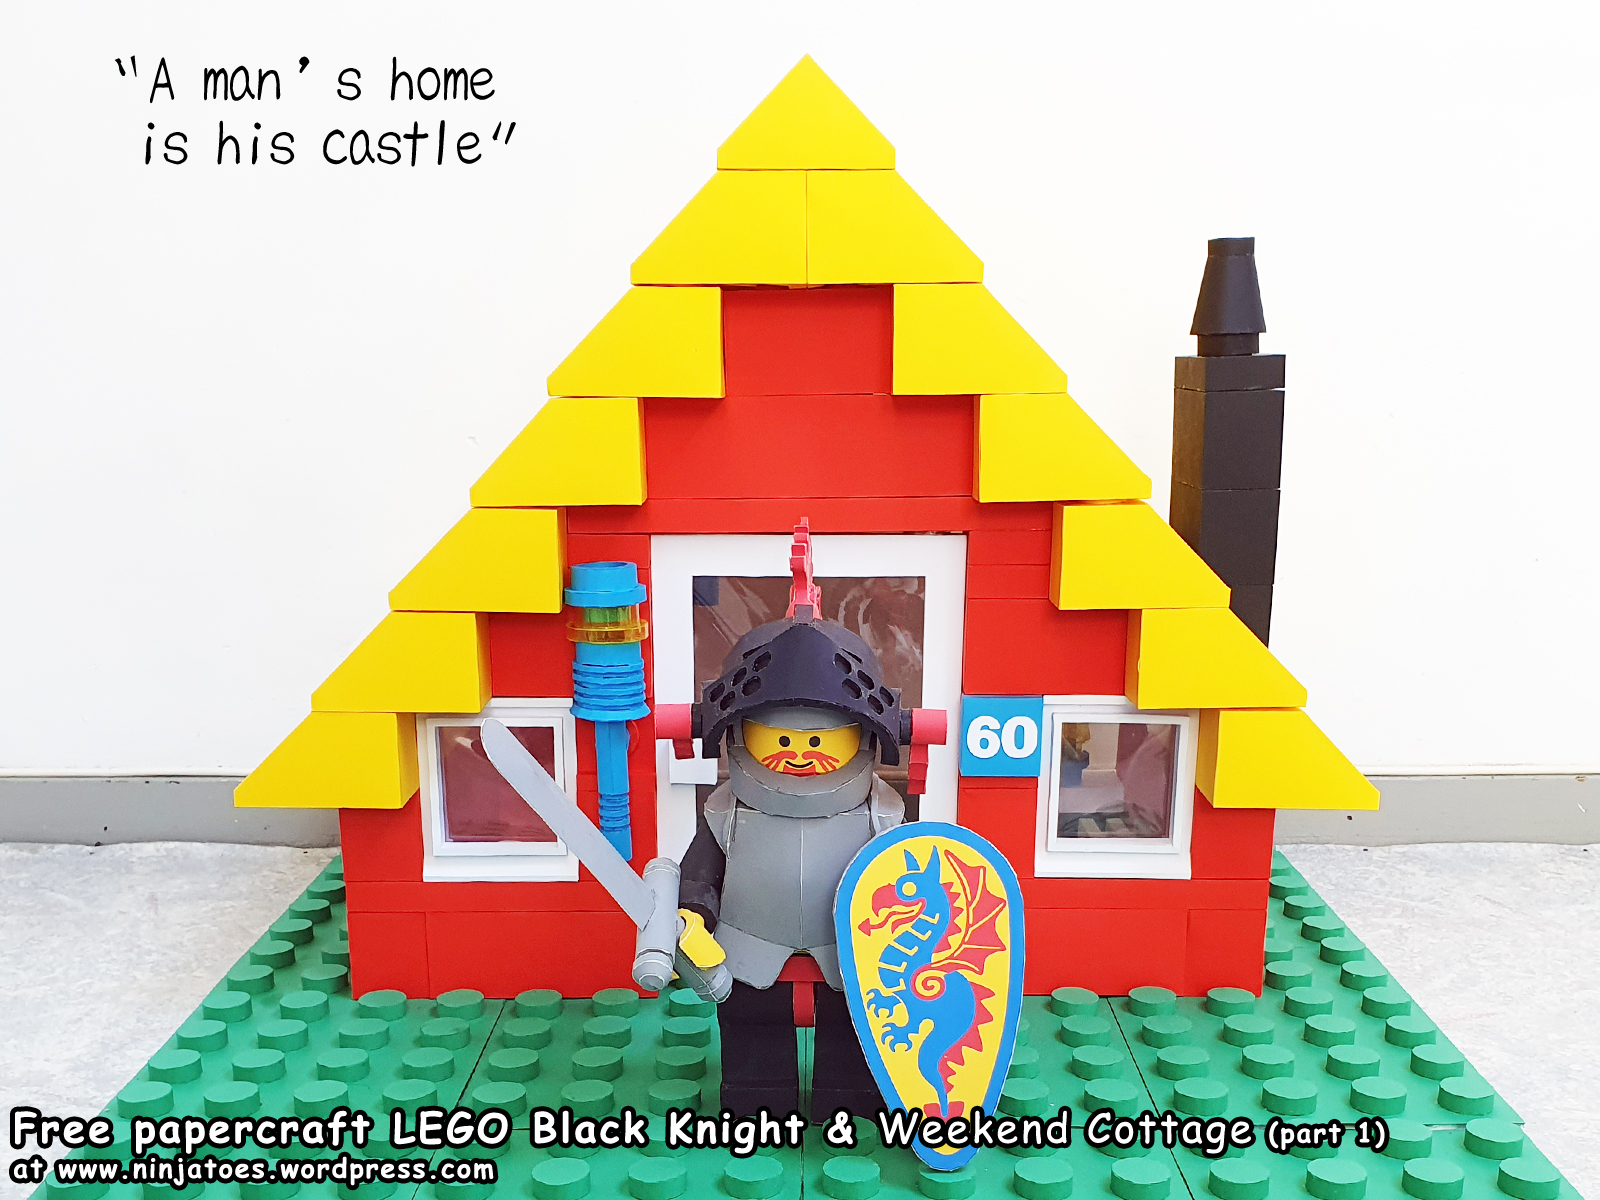
free papercraft LEGO set 6592 Weekend Cottage release! :o)


So this was a *BIG* project! But it's finally finished! 🏡😀
(I'll make the little garden and barbecue and minifigs at a later stage...)

I made instructions for how to make all the bricks, how you can use the files with a cutting machine like the Silhouette Cameo 4, and of course for assembling the set as a whole. I included a cut list to know how many of each page for how many Bricks you need, and in which color for this particular set.

I made it to be cut from colored 160 gsm paper and colored transparant sheets, and there's even a Sticker piece! 😀

Download + build your own free papercraft LEGO Bricks:

Have fun building!


Saturday, June 26, 2021

papercraft LEGO set 6592 Weekend Cottage WIP; the problem(s) with parts from plastic transparancies


Although it's called 'papercraft', I've used different materials before, like 'metallic' / 'mirror' sheets, even some glow-in-the-dark sheets (it turned out to sticker sheets when I received them after ordering them 😝 but it still worked) and of course plastic transparancies. 😊

I've had a little more time this week to work on making the instructions and figuring out a nice way to organize the templates and everything for the release of my papercraft LEGO set 6592 Weekend Cottage!

Most papercraft LEGO Bricks aren't too difficult to assemble really, since they're basically just a bunch of rectangles and cylinders of course, and paper is really easy to work with, folding and gluing it together.

The transparant parts however can be a bit tricky. Before, I used printable transparancies, so I could print color onto the sheet just like a 'normal' papercraft part. And since I did the cutting by hand, I could VERY gently score the fold lines with as little pressure as I liked.

This time though, I was able to find some colored transparancies in the color(s) I wanted, so I didn't have to print the Transparant Yellow pieces that you need to make the lights of the Cottage! 💡😀

When using a cutting machine like the Silhouette Cameo 4 though, you REALLY have to be careful scoring the parts and then folding them along the scored lines... I used the lowest settings (cut depth 1 and pressure 1) and still sometimes it went too deep and then when I tried to fold the parts the plastic sheet would snap along the 'scored' fold line...

There's not much to do about that, since plastic isn't really suited to be scored like paper is... But an alternative would be to change to solid / continuous lines to dashed lines; that way there will always be some parts of the lines that won't get cut / snapped, while the (partially) 'scored' line will guide you folding it in the right place and in a straight line! 🙂


The next problem of using transparant, plastic sheets to make papercraft parts is gluing them together; gluing together paper is easy and it's easy to find glue that can glue paper, but for gluing plastic sheets, you would really need some special glue, and usually those kinds of glue either:
  • Just won't work very well if the part is under tension (like gluing cones or cylinders, that naturally want to pull apart);
  • Or it will work SO well, that you don't have time to move around the pieces anymore to fix a small misalignment for example if you didn't align them perfectly as soon as you put them together...
So good glues for plastic sheets like that are difficult to find, and/or pretty expensive...

So in the past, I used doublesided tape for putting transparant, plastic parts together. It takes some extra time and effort, because basically you have to apply the doublesided tape to the gluing tabs, then usually cut it to match the gluing tabs (which takes extra work if there all a lot of small tabs like on cylinders...), then remove the backing and then carefully align the part to 'glue' to be attached to the gluing tabs.

With the tape I've been using so far though, especially when there really was a lot of tension in the parts, the parts would still come apart a bit too easily... 😐

But for this project, I tried a different kind of doublesided tape: Crafter's Companion Red Liner Tape! 😀

It's really a lot stronger than the tape I used before, and despite it looking red, that's just the backing of the tape that you peel off. The tape itself is actual crystal clear so you hardly see it when the part is assembled! It works really well, and if you're able to get it, I really recommend it for this kind of thing! 😊


And now, back to finishing the templates and instructions for the release of the papercraft LEGO Weekend Cottage. 😉

Stay tuned!

Saturday, June 12, 2021

papercraft LEGO set 6592 Weekend Cottage WIP


It took about half an hour before somebody guessed that what was in the box? were 256 studs that are part of a new LEGO papercraft that I'm working on.


Well, new... I've actually been working on this project for quite a while now; but especially with big projects like this, I like to do smaller ones on the side so I have something to finish while I am still doing the tedious work on the big project. 😊

And boy, is this a big project...

It's such a *big* project actually, that I'm only making half of it now (the house part) and I'm saving the little garden with the barbecue for a later time.

And even then, it's such a BIG project, that I actually decided to get myself a Silhouette Cameo cutting machine to do the cutting! 😀


There are just so many repetitive cuts (just think of the 256 identical papercraft studs in the box alone...!) that it was really worth it. It also made it really easy to just make 'blank' bricks and cut them out of different colored paper.


I actually used 160 gsm paper instead of 200 gsm this time, because I could get it in a variety of colors that I needed, and I even found some good colored transparancies and I even used some sticker paper for the cute little sticker on the roof window! 😊


As you can see I already finished all the bricks and complete the Weekend Cottage, but I want to organize everything properly before I release it.

After modelling the bricks in SketchUp, tidying them up in Metasequoia and unfolding them in Pepakura Designer like I always do for my papercraft LEGO minifigs as well, this time I exported the templates as *.dxf files so I could organize the sheets in AutoCAD LT.


So far, that's what I did once before for my Royal Netherlands Navy Walruss-class submarine, that I also printed/cut from colored (black) paper. The difference is that this time, I organized all the fold and cut lines (and explanatory text that you won't actually have to cut) in separate layers and colors so I could easily assign the appropriate cutting actions to them in the Silhouette Studio.

(I upgraded to the pretty expensive Silhouette Studio Designer Edition, because if I imported a *.dxf or *.pdf file in the Standard Edition, it would loose the layer information that I worked so hard on... 😆)
  • THE LAYERS AND THEIR CUTTING ORDER:
  • 01_MountainFold -  blue  lines; I gave the mountain folds and valley folds different colors so that if you can check with the PDF file which way you should fold the pieces. These lines should be scored, NOT cut all the way through the paper!
  • 02_Valleyfold -  magenta  lines; You can switch these with the mountain fold lines, because the scoring order doesn't really matter (but again, change the settings on your cutting machine so it does NOT cut all the way through the paper!)
  • 03_CutFirst -  red  lines; There are a lot of slits and holes that need to be cut from the papercraft bricks. Even though you should have a sticky cutting mat, I like to do this before cutting the parts loose from the paper to avoid them shifting on me.
  • 04_CutSecond -  Black  lines; Once you've cut all the slits and holes, you can have the cutting machine cut the parts loose from the paper.
  • 05_DontCutDontFold -  green  lines; these are just explanatory notes, and you can turn off this layer in Silhouette Studio so they don't get cut.
I managed to keep most of the parts on A4 sheets (except the 2 x 8 Sloped Bricks and the 16 x 16 Baseplate) while keeping the same scale as my papercraft minifigs.

(I won't redo my papercraft minifigs as vector or cut files though, because at this point it's just much easier and faster for my workflow on those to just work with the files I already have of them...!)

Now I stall want to organize everything nicely, and then I'll put the bricks on my papercraft webpage with all my other free papercrafts as usual. 😉

Stay tuned!


(small print): I found that especially the 1 x 6 papercraft LEGO Bricks are quite tricky to 'build' with. On the underside of LEGO bricks are tubes/pins that align the brick with the studs on top of other bricks. On the paper version though, those tubes/pin are flexible, and they move around a bit, making it difficult to align all five tubes/pins on the underside of the 1 x 6 bricks with the studs of another brick at the same time... It *is* possible if you're patient and don't loose your temper, but alternatively you can choose to leave them out from the start. The 1 x 2 and 1 x 3 Bricks and the plates worked fine for me, but don't forget that it's all just flexible paper in the end and the paper Bricks won't go together as easily as real ones! 😉


Friday, December 25, 2020

Free Christmas 2020 papercraft: LEGO Wind-up Toy Soldier minifigure! :o)

Ceci n'est pas un cracker du noisettes.

With his rosy cheeks and tidy red uniform you might think this new free papercraft LEGO minifigure you can see above is a nutcracker, but it is really not! 

Just look at the key in his back and you'll realize that it is actually a wind-up toy soldier. (well technically it's a video of a papercraft LEGO wind-up toy soldier minifigure 😇)

You guys (should 😊) know that I like to make a special Halloween papercraft each year. But this year as a surprise, I decided to make one for Christmas too! 🎅🎄

Oh. and if you're wondering how I made the wind-up toy sound effect in the release video: LEGO actually made a real, working wind-up motor in the 1980's!

It came with wheels, so it was obviously meant to use with your LEGO cars 🚗, but of course you can also make it into a duck. 🦆😋


Download free papercraft LEGO Wind-up Toy Soldier:

I hope you like it, have fun building! 🙂