It took about half an hour before somebody guessed that what was in the box? were 256 studs that are part of a new LEGO papercraft that I'm working on.
Well, new... I've actually been working on this project for quite a while now; but especially with big projects like this, I like to do smaller ones on the side so I have something to finish while I am still doing the tedious work on the big project. 😊
And boy, is this a big project...
It's such a *big* project actually, that I'm only making half of it now (the house part) and I'm saving the little garden with the barbecue for a later time.
And even then, it's such a BIG project, that I actually decided to get myself a Silhouette Cameo cutting machine to do the cutting! 😀
There are just so many repetitive cuts (just think of the 256 identical papercraft studs in the box alone...!) that it was really worth it. It also made it really easy to just make 'blank' bricks and cut them out of different colored paper.
I actually used 160 gsm paper instead of 200 gsm this time, because I could get it in a variety of colors that I needed, and I even found some good colored transparancies and I even used some sticker paper for the cute little sticker on the roof window! 😊
As you can see I already finished all the bricks and complete the Weekend Cottage, but I want to organize everything properly before I release it.
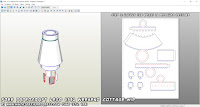
After modelling the bricks in SketchUp, tidying them up in Metasequoia and unfolding them in Pepakura Designer like I always do for my papercraft LEGO minifigs as well, this time I exported the templates as *.dxf files so I could organize the sheets in AutoCAD LT.
So far, that's what I did once before for my Royal Netherlands Navy Walruss-class submarine, that I also printed/cut from colored (black) paper. The difference is that this time, I organized all the fold and cut lines (and explanatory text that you won't actually have to cut) in separate layers and colors so I could easily assign the appropriate cutting actions to them in the Silhouette Studio.
(I upgraded to the pretty expensive Silhouette Studio Designer Edition, because if I imported a *.dxf or *.pdf file in the Standard Edition, it would loose the layer information that I worked so hard on... 😆)
- THE LAYERS AND THEIR CUTTING ORDER:
- 01_MountainFold - blue lines; I gave the mountain folds and valley folds different colors so that if you can check with the PDF file which way you should fold the pieces. These lines should be scored, NOT cut all the way through the paper!
- 02_Valleyfold - magenta lines; You can switch these with the mountain fold lines, because the scoring order doesn't really matter (but again, change the settings on your cutting machine so it does NOT cut all the way through the paper!)
- 03_CutFirst - red lines; There are a lot of slits and holes that need to be cut from the papercraft bricks. Even though you should have a sticky cutting mat, I like to do this before cutting the parts loose from the paper to avoid them shifting on me.
- 04_CutSecond - Black lines; Once you've cut all the slits and holes, you can have the cutting machine cut the parts loose from the paper.
- 05_DontCutDontFold - green lines; these are just explanatory notes, and you can turn off this layer in Silhouette Studio so they don't get cut.
I managed to keep most of the parts on A4 sheets (except the 2 x 8 Sloped Bricks and the 16 x 16 Baseplate) while keeping the same scale as my papercraft minifigs.
(I won't redo my papercraft minifigs as vector or cut files though, because at this point it's just much easier and faster for my workflow on those to just work with the files I already have of them...!)
Now I stall want to organize everything nicely, and then I'll put the bricks on my papercraft webpage with all my other free papercrafts as usual. 😉
Stay tuned!
(small print): I found that especially the 1 x 6 papercraft LEGO Bricks are quite tricky to 'build' with. On the underside of LEGO bricks are tubes/pins that align the brick with the studs on top of other bricks. On the paper version though, those tubes/pin are flexible, and they move around a bit, making it difficult to align all five tubes/pins on the underside of the 1 x 6 bricks with the studs of another brick at the same time... It *is* possible if you're patient and don't loose your temper, but alternatively you can choose to leave them out from the start. The 1 x 2 and 1 x 3 Bricks and the plates worked fine for me, but don't forget that it's all just flexible paper in the end and the paper Bricks won't go together as easily as real ones! 😉


No comments:
Post a Comment