And now, for something completely different! 😊
I didn't make a whole lot of progress on finishing up the release for my papercraft LEGO set 6592 Weekend Cottage, because 1) it's been a *very* busy week (as usual lately...) and 2) I spent yesterday building the Game Boy Advance I always wanted! :)
Now let's get one thing straight: I absolutely LOVE 💝 my original GBA Glacier! And it has tons of awesome games! But man, that screen... (and man, that battery life... 🔋🔋)
I knew from the internet that people had been modding their GBAs with backlit LCD screens, new shells and rechargeable battery packs for exactly these reasons!
Now I didn't want to harm my original GBA Glacier, so I bought a different, second-hand GBA to serve as a donor for the motherboard that you need.
And being from the Netherlands, I was happy to finally find an EU store that had all the parts that I would in stock need (RetroReiZ in Germany, which started carrying all the products from RetroSix just in 2021! 😀)
- Backlit IPS LCD screen (FunnyPlaying V2 version)
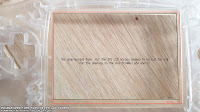
- A new shell and buttons (a clear, pre-trimmed shell (if you use an original shell, you have to trim the inside a bit yourself to fit the new screen) with transparant black buttons and black rubber pads)
- A glass protective lens (instead of the original plastic one)
- A rechargeable battery pack (CleanJuice version, with a USB-C connection
- A replacement battery cover with pre-cut slot for the USB-C charging connection (clear to match the rest of the shell)
So yeah; this is not really an inexpensive mod to do... 💰 😅
But installation went alright I guess; soldering the three wires (to be able to adjust the brightness of the new LCD screen) was the trickiest part (well I don't have the best soldering iron to be honest... 😊).
With the special made, pre-trimmed shells, apparantly you don't need the plastic brackets you normally need to center the LCD screen anymore?
So I was expecting everything to fit perfectly, but for some reason I had to trim quite some of the doublesided tape that holds the screen in place...? It turned out fine with the screen perfectly centered though.
A tip too: the new small screws that are included seem easily stripped, but an easy way to prevent that is to use the CORRECT size screwdriver; I actually bought a new set that said specifically they were for Nintendo and / or GBA screws but they really seemed at least a size too small...?
It took longer than I anticipated (mainly because of the soldering) but I am very happy with it! And with the clear shell and transparant black buttons, I think my new GBA it looks pretty cool! 🎮😎
And man, that screen compared to the original one makes it really worth it! 😃
This allows you to load all your Game Boy, Game Boy Color and Game Boy Advance (and even NES!) games onto a micro SD card (get a fast one though!) which you can then place into the EZ Flash Omega to use in your real Game Boy Advance.
In fact, apparantly you can literally fit every GB, GBC, GBA and NES game ever made onto one 16 GB SD card for use with the EZ-Flash Omega! 😃
Then on startup, you can just select which of your games you want to play and you don't have to swap cartridges every time you want to play a different game! 🙂
Unfortunately, your computer probably doesn't have a GBA cartridge slot to transfer the games from the Game Boy cartridges to the micro SD card... But with the Retrode 2 cartridge dumper and its GBx plugin from the German online store DragonBox, you can do just that! (unfortunately, DragonBox undrstandably usually doesn't have a large stock of this specialized device and the Retrode 2 is often sold out, but every now and then they'll have a new batch made) 😊
At one point I was fortunate enough to snatch one of the Retrode 2 so I could dump my own ROMs, which I actually often played through an emulator instead of my GBA...
But now I can play them on my actual 'ultimate' Game Boy Advance without any hassle! 😊
Next week: papercraft again! 😁


No comments:
Post a Comment