Showing posts with label Misc. Show all posts

Friday, March 13, 2026

nitter as Twitter alternative so you don't have to be logged into 'X' anymore!

nitter with my public tweets

Twitter ('X') that doesn't show you any of them

For about 2 years or so I think, Twitter ('X') needs you to he logged in to X to see people's timelines (like this papercraft one from me that I'm shamelessly promoting here now: @ninjatoespaper 😉).

Now, you can still just sign up for X (formerly know as Twitter) for free of course and everything just works fine again, but it's another extra treshold that random visitors  to my blog here would have to do go through for just a simple hobby like papercraft (and with free things like Twitter "you are the product" then of course, and understandably not every body wants that...)

I deleted my Twitter wdget after a  while because I didn't want that for them, but now I found nitter, which basically lets you find any twitter timeline with their public tweets (which my free papercraft Tweets are of course so that everybody can see them 😊) and shows them for free kinda just like Twitter did earlier!

It doesn't work on my main ninjatoes.com site (because that just has a cheap basic plan that doesn't allow iframes that nitter uses for the widget 😊) but as you can see on the left side on my free Blogspot blog here it does let you view all my tweets without you having to be logged into  X again!

Thursday, December 11, 2025

The power of Google Translate (also on papercraft images!)

Some time ago I showed you how to look for papercrafts that have "gone dead" over the years yourself (in this post).

I think it's important to learn that of course because it's gonna happen more and more the older you get and harsh but true, the only one that's going to spend time to help you with that is yourself (that's really not sad 😞 or anything I think, but other people just won't have the time in their lives to help you with things that most people don't care a lot for, and let's be honest: a papercraft that you like really isn't thát interesting to most other people... 😐).

That's why earlier I started doing my "How to 3D extract" series to show you how to do that using free tools too (because I can't spend a lot of time and money myself either and luckily there are already a lot of smart people that do want to help others for whatever reason 😊!) And thanks to the internet you (and I at some point during my papercrafting hobby happily enough 😉) could find them too!)

Long story short for now, I decided that maybe I can help you talk about how I deal with Japanese (or other languages that you don't understand) papercrafts with free tools in case you don't know yet!

1) Google Translate for searching more (https://translate.google.com/)
This helps a lot if (like me) you can't read Japanese (or most of the World's languages fluently to be honest...). On the Google Translate website, you can copy+paste any text in the translate box, set the language the text to translate is in (or if you don't recognize the language, you can ask Google Translate to try and recognize it itself) and then set up our native language as the resulting language!


But what's more, instead of a piece of text, you can also input a website URL and then it gives you a URL that you can click to visit a translation of the website (or you can go the special "Websites" tab for the same thing 😉)! It won't be perfect of course, but usually it's enough to help you understand what you're on the website for so it can help you find papercrafts! 🙂


(you can always switch between the tranlation and the original language!)

2) Translate JPG Images (sometimes first converting PDF files to JPG images!)
Since papercraft are usually images, you can't just copy+paste into Google Translate. If they do come with text like instructions, you can use Google Translate Image or Documents tabs to translate the text in them.


Once the translation is done, you can Copy the translated text or Save the whole translated image for your convenience (I think it will be best to build the original PDF file though!)

You might need to convert the PDF parts files to JPG images with a tool like Zamzar (or another free "PDF to JPG conversion" tool that you know) like in this case too (an old super deformed old F-15 fighter plane that somebody asked me about causing me to tell you about it 😊).

(I actually got curious and found out that it also works for my own instructions after converting the PDF files back to JPG images! The Legend of Zelda Pamela and her dad can attest to that, so maybe I should stop making the instructions into PDF files in the future?)


I hope you found Google Translate as useful as I did and I'll think about that question for my next new papercraft (which you'll find here on my blog and on my own download site: Ninjatoes' papercraft webpage of course 😀)

Have fun and Merry Christmas everybody!🎄

Friday, October 24, 2025

free Rodrigo Rivas Costa's Papercraft tool with cool Pokémon and die examples!


"And now, for something completely different!" Well, "something somewhat different" I guess, in that it isn't really a 'daily download' papercraft that I found and am telling you about that you can just download and build yourself for free. ...wait, you can just do that too... You know, let's just start telling you! 😊

You know, I've used Pepakura for a VERY long time to make papercraft models and I still absolutely love it! There are actually many other 'unwrappers' that you can use though, and Papercraft from Rodrigo Rivas Costa is another one! 😀

Papercraft looks like Pepakura that you can install on your computer to use offline or like the online Paper Maker, just a version that looks like it 
fewer options (but that really doesn't 😉).

It's a standalone application, meaning you can download it to your computer, but you don't actually have to install it on your computer! You can just download and unpack the last Papercraft Asset (like the 32- or 64-bit version Zip-files for Microsoft Windows or the DMG file for MacOS computers) at the bottom from Rodrigo Rivas Costa's Github account and just unpack it in a folder to run it: 😃

NOTE: my Microsoft Defender SmartScreen doesn't recognize rodrigorc as a big software publisher, so the first time I ran his Papercraft application it told me it wanted to protect my computer from harm: ONLY CLICK More info to reveal the Run anyway button if you trust it of course!


If you do trust it and download it, you can use Rodrigo's Papercraft tool from a file folder from your computer! 😀 It's a pretty self-explanatory tool and there's a whole README on Rodrigo's Github to learn how to Import a new *.obj or *.stl 3D model (that you do need to make first in Blender for example) and (of course I would say 😉) it can also import Pepakura *.pdo files.

What's more, if you look in the unpacked download folder, you can also Open four *.craft files (that's the very aptly named file extension for the Papercraft tool 😊): Rodrigo added a papercraft die 🎲 and (because I think he's a Pokémon fan to, just look at his user icon on his Github page 😉) a papercraft low-poly Bulbasaur 🌱, Charmander 🔥 and Pikachu 🗲 (made by Agustin Arroyo under Creative Commons CC BY-NC-SA 4.0  license) to show you what his Papercraft tool can do and to get you started!

I think Rodrigo's Papercraft is a very cool unwrapping tool, so check it out and if you create any nice paper model, Rodigo would appreciate it if you open an issue on Papercraft's Github page and send some pictures! 😀

Rodrigo Rivas Costa's Papercraft tool:

Sunday, October 12, 2025

The Sims 4: Papercraft Awaits in October 2025 expansion pack!


Everybody knows the Sims games! Even if you never played them (like me to be honest), you know it's a life/social simulation videogame that well, lets you play your life and be good at it! (or die trying I guess 😉)


Of course you could use this official papercraft Sims 3 Plumbob since 2012 (under "Origami  Plumbob" next to the third Sims 3 "Celebrate the Sims' Birthday! POSTED ON 1/24/12 08:48 PM" logo near the top if you go to the American site using the USA flag at the top of the Sims 3 page!) to go as a Sims character for Halloween 🎃, but that's not the new news that I want to bring you now!
NEW NEWS
On October 2, 2025 they released the Adventure Awaits expansion pack for the Sims 4 and one of the adventures that awaits you is the ability to learn a fun hobby called 'papercraft':
"Download and print a page of 2D parts (preferably on some thicker paper) cut them out and fold them, and then glue them together to make your very own 3D paper model of your favourite game/anime/movie character/whatever you like!"
Okay, it's a little bit different in the Sims because you first need to get the DIY Delight Papercrafting Kit from Build Mode in the game for §20 (Simoleon, Sims dollars in the game) or have the luck to just come across some papercrafting supplies in the Sims world (never happened to me to be honest in real life, but you never know! 😉)


(sreenshots from Simming Simplified)

Elder
, adult, young adult, teen and child sims can learn the skill. Learning means you have to practice the skill until you get better and better at it it (just like in real life of course 😀). Just like in real life most people can build a paper airplane or do some simple origami (or their origami Plumbob I guess 😉) from the start but you improve from your level 1 to level 10 by practice (sure you can read papercrafting books, but it goes much slower and only gets you to level 9)! I think once you are at level 10, you can become a papercraft mentor to help others I think!

What to can do with your papercrafts? You can gift them to your friends or proudly display them around your house (get a lot more shelves in your house...! 😉)


(screenshots from the The Sims Community)

Have fun playing the Sims 4 Adventure Awaits expansion and building papercrafts! 😊
(well and scour the internet to find out more about the Sims 4 new papercraft skills - just like in real life 😉)

DISCLAIMER:
Your Sim might get bitten by the papercraft bug 🐛 too and start making their own
free papercraft Tomb Raider vignettes, or even make their own papercraft webpage:

Wednesday, August 20, 2025

Ways to look for old papercrafts with "dead links" on my weblog here?

Let's face it, the papercrafts that I found and shared with you all over the years since 2008 may have been deleted long tim ago by now... (of course the papercrafts that I made and shared myself since 2001 are all still available on my main website at www.ninjatoes.com 😊)

For the ones that you find in my blogposts here or that I shared in one of the link lists here though, you can still try to look whether they still exist? You can do that in various ways:

1) Use the dedicated search box
Maybe the creator just rearranged their website and just moved the webpages around? Most websites have a dedicated search box where you can look for the papercraft if you know the name (try what you find here on my blogposts here) or look for a more general search term (who knows what else you might find? 😀).


2) Do a site: search using Google
If the website doesn't have a dedicated search box, you can still do a site: search in Google. Go back to the URL of the website (including the http:// or https:// part), delete anything but the domain name (usually it ends with .com or something so that you know you're looking in the entire site) and then the search term that you're looking for, a space and then site: (including the colon) just in front of the domain name. You can write out the "code" for a site: search like so:


Then when you press enter, Google will search for your term in the entire site (depending whether you started on the main domain name, or a parent page if you wanted to 😀)


3 Use the Wayback Machine (https://web.archive.org/)
Sometimes the whole website will (understandably) be gone though after some years... you can go to the Web Archive and see whether it has saved (crawled) the old site with the papercrafts you're looking for?

  1. Type the URL or the papercraft download webpage (that's why I never delete old links in blogposts) in the Wayback Machine.
  2. Then press "enter" and hopefully it will find a number of times when it "crawled" the site, indicated by a blue circle (green circles are redirects).
  3. Choose a date close to the blogpost (or a newer date to see which newer papercrafts it had since I posted it and before the site went away?)
  4. Then choose one of the times to see what it used to look like at that time and hopefully you can still download the papercrafts!

Sometimes you get lucky and you can still download the old papercraft, but sometimes the Internet Archive didn't actually save the actual papercraft file downloads (that's usually the case with filesharing sites like RapidShare (remember that? 😉), Megaupload or one of the many others) and then I can't really help you either...


Sometimes like on bigger sites that saved the downloads on its own webspace though, and the Internet Archive has crawled it at some point (there's luckily a lot of papercraft sites like that though), so you can still find it if you find the right date!


(4 Look around on other sites)
If the methods1-3 didn't help you, you may still find it if somebody else saved it before you on some other website (usually fun, popular papercrafts 👍)! Needless to say, if you find a papercraft that you like (even if you won't build it right away) just save it! 😀

Saturday, August 31, 2024

I'm really just a big boy...


Because I'm still busy as ever and building LEGO sets doesn't take much time - and because I'm a grown man that's  really just a big boy. 😋

Sunday, January 28, 2024

Ninjatoes.com from now on, ad-free and all! :o)


Today I:


1) Fixed all the broken image links on my main papercraft webpage (where you can download all the papercrafts I made myself for free!) 😊
2) Paid for a Wordpress.com subscription plan so that it doesn't show ads anymore (because that way it's even more fun to visit) 👍
3) Got a personal domain name so that it can also be reached using ninjatoes.com from now on! ✂️🎉

So what are you waiting for? Go check it out! 😀

Sunday, June 20, 2021

Game Boy Advance IPS LCD, rechargeable battery pack mod and EZ-Flash Omega cartridge

And now, for something completely different! 😊


I didn't make a whole lot of progress on finishing up the release for my papercraft LEGO set 6592 Weekend Cottage, because 1) it's been a *very* busy week (as usual lately...) and 2) I spent yesterday building the Game Boy Advance I always wanted! :)

Now let's get one thing straight: I absolutely  LOVE 💝 my original GBA Glacier! And it has tons of awesome games! But man, that screen... (and man, that battery life... 🔋🔋)


I knew from the internet that people had been modding their GBAs with backlit LCD screens, new shells and rechargeable battery packs for exactly these reasons!

Now I didn't want to harm my original GBA Glacier, so I bought a different, second-hand GBA to serve as a donor for the motherboard that you need.

And being from the Netherlands, I was happy to finally find an EU store that had all the parts that I would in stock need (RetroReiZ in Germany, which started carrying all the products from RetroSix just in 2021! 😀)
  • Backlit IPS LCD screen (FunnyPlaying V2 version)
  • A new shell and buttons (a clear, pre-trimmed shell (if you use an original shell, you have to trim the inside a bit yourself to fit the new screen) with transparant black buttons and black rubber pads)
  • A glass protective lens (instead of the original plastic one)
  • A rechargeable battery pack (CleanJuice version, with a USB-C connection
  • A replacement battery cover with pre-cut slot for the USB-C charging connection (clear to match the rest of the shell)
So yeah; this is not really an inexpensive mod to do... 💰 😅

But installation went alright I guess; soldering the three wires (to be able to adjust the brightness of the new LCD screen) was the trickiest part (well I don't have the best soldering iron to be honest... 😊).

With the special made, pre-trimmed shells, apparantly you don't need the plastic brackets you normally need to center the LCD screen anymore?

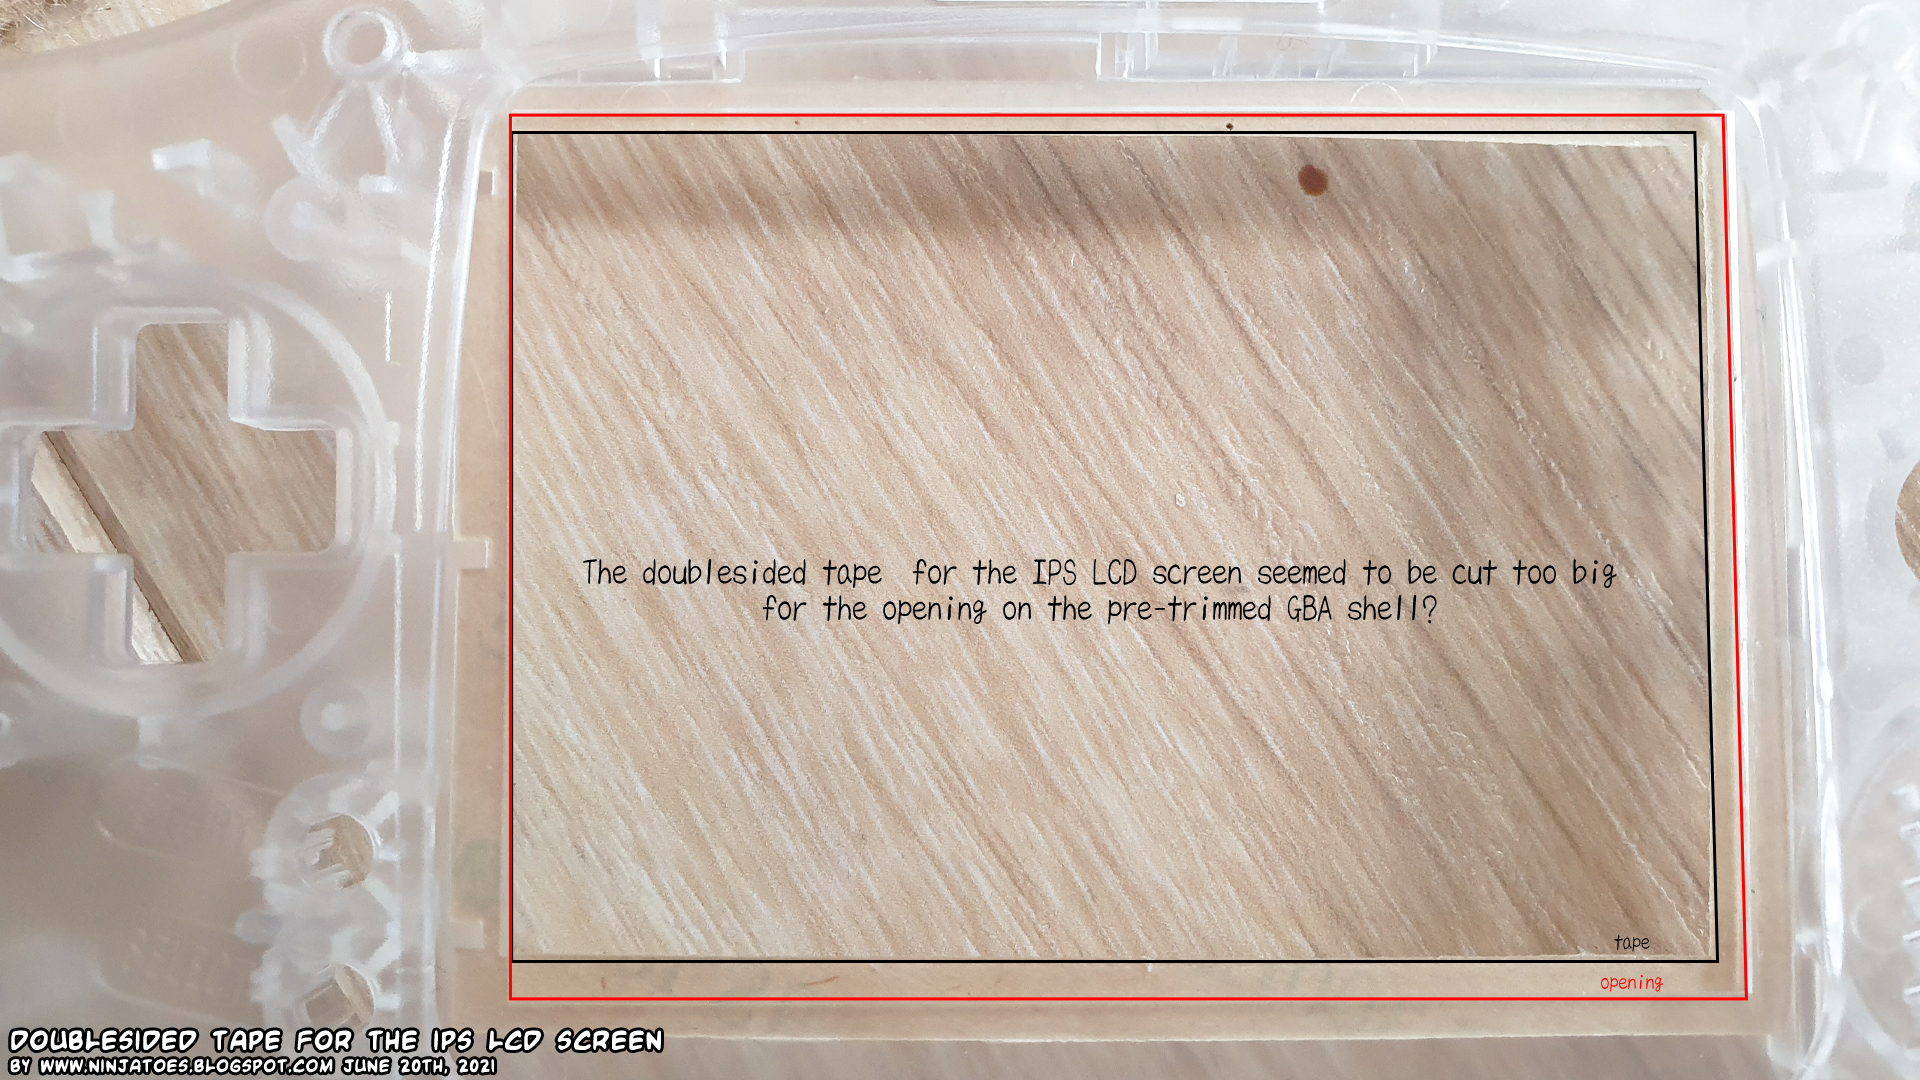
So I was expecting everything to fit perfectly, but for some reason I had to trim quite some of the doublesided tape that holds the screen in place...? It turned out fine with the screen perfectly centered though.


A tip too: the new small screws that are included seem easily stripped, but an easy way to prevent that is to use the CORRECT size screwdriver; I actually bought a new set that said specifically they were for Nintendo and / or GBA screws but they really seemed at least a size too small...?

It took longer than I anticipated (mainly because of the soldering) but I am very happy with it! And with the clear shell and transparant black buttons, I think my new GBA it looks pretty cool! 🎮😎

And man, that screen compared to the original one makes it really worth it! 😃


As an extra bonus for myself, I also decided to get an EZ-Flash Omega cartridge from the Dutch shop Rinku Retro. 🙂

This allows you to load all your Game Boy, Game Boy Color and Game Boy Advance (and even NES!) games onto a micro SD card (get a fast one though!) which you can then place into the EZ Flash Omega to use in your real Game Boy Advance.

In fact, apparantly you can literally fit every GB, GBC, GBA and NES game ever made onto one 16 GB SD card for use with the EZ-Flash Omega! 😃

Then on startup, you can just select which of your games you want to play and you don't have to swap cartridges every time you want to play a different game! 🙂

Unfortunately, your computer probably doesn't have a GBA cartridge slot to transfer the games from the Game Boy cartridges to the micro SD card... But with the Retrode 2 cartridge dumper and its GBx plugin from the German online store DragonBox, you can do just that! (unfortunately, DragonBox undrstandably usually doesn't have a large stock of this specialized device and the Retrode 2 is often sold out, but every now and then they'll have a new batch made) 😊

At one point I was fortunate enough to snatch one of the Retrode 2 so I could dump my own ROMs, which I actually often played through an emulator instead of my GBA...

But now I can play them on my actual 'ultimate' Game Boy Advance without any hassle! 😊

Next week: papercraft again! 😁


Sunday, October 25, 2020

Halloween spiderwebbing


🦇 Halloween is not really a traditional holiday in the Netherlands, but we do enjoy a fun, scary Halloween movie and more and more people just like the overall spooky atmosphere during these dark days. 🎃😊

So for some of the pictures of my 'special' Halloween papercraft this year (no, it's not the paper Jack-o'-lantern in the pictures 😉) I decided to get some typical Halloween decorations I always see in Halloween movies, including some of that stretchy spiderweb material.

It was my first time using it but it's really fun material! I only used like 1/4 to 1/3 of the 60 grams in the bag that I got and it stretched quite far; in fact I think it looks better the more you stretch it. 😊

It's a bit difficult to see against the white wall, but I'm pretty happy with how it turned out, especially the top bit; it was a bit difficult to use because I was only using a clothesline to attach it to and some tape to stick it to the floor, and I think it would look better against some bushes or fence or something outside, where you can attach and stretch it better.

If you want to see what my Halloween papercraft will be this year be sure to check back next week, for now I just wanted to share how much fun making a scary spiderweb for Halloween is. 🕸😉

Thursday, June 11, 2020

LEGO Tomb Raider II Brick Lara statuette MOC


Yes yes, this is a papercraft weblog... But you already know I love LEGO too. 🧱😇 I came across a LEGO Lara made by vir-a-cocha, and I got inspired to make my own LEGO Lara statuette!


(check out vir-a-cocha's version on their Flickr page:

Lara Croft: Tomb Raider

Vir-a-cocha made their LEGO Lara in her classic adventurer's outfit, so I decided to make her in the Tomb Raider II SOLA wetsuit version (I made a papercraft vignette of it as well: link 😉).

I think you can a lot of similarities in construction, and also some differences. My Brick Lara has a different pose, and to be honest it's not very stable: I guess she's made to look at, and not play with... 😋

Some notes:
  • Lara's waist is supported by two only studs, so it's not very strong... Handle her with care!
  • Lara's upper legs kept popping loose, so I inserted two 3L bars into her thighs to prevent that from happening.
  • Because of the running pose, Lara wants to fall backwards, breaking apart her right leg, so I added that Weird Rock Piece to support her left leg. 😉
  • I used Technic 1/2 pins to attach Lara's backpack and holsters, and to prevent them from rotating, I inserted small strips of paper for a tighter fit.
  • Lara's backpack is in the way of her ponytail, but there is enough play in the round bricks to angle them a little bit to clear it. 😉

I made a parts list (be sure to check it thoroughly yourself to make sure I didn't make a mistake!)  and building instructions if you want to make your own Brick Lara exactly the same way as I did (you can get all the bricks from the wonderful BrickLink website).

But don't forget it's LEGO, so you can also just make a different version your own way of course! 😀


Have fun building!


See more pictures: link 📷