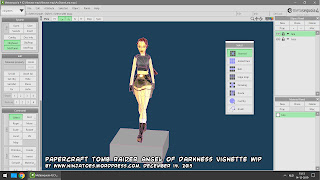
Did you know that the Japanese title for Tomb Raider: The Angel of Darkness ("トゥームレイダー美しき逃亡者") translates to "The Beautiful Fugitive"? Which is a much more fitting description of course. 😉
This sixth installment of Lara's adventures was created as the first 'next-gen' Tomb Raider game, with much more detailed graphics and character models, including Lara. It was however the last Tomb Raider game made by Core Design, the developer that created the classic ones too that make such nice little papercraft vignettes.
I played The Angel of Darkness on the Playstation 2, and maybe not a lot of people know this, but there's actually a cute little Lara that strolls about on your Memory Card when you save the game:
It's a much simpler character model than the in-game one of course, which makes that she'd fit perfectly with the simple style of the my other Core Design vignettes!
So I used the PS2 Save Builder 0.8x (running as Administrator in Windows XP Service Pack 2 compatibility mode on my 64-bit Windows 10 system) to extract the save icon from a Code Breaker *.cbs save file (simply click the "static.ico" and choose "Extract"). Then you can use the PS2 Icon Importer/Exporter 0.8 plugin by Vector to open the save icon model in Milkshape 3D 1.8.2 and save it to a more common 3D file format (changing the file extension to *.icn or choosing "all files" when trying to import it).
Tools used:And now I have a nice little low-poly Angel of Darkness Lara as a base model for a new papercraft Tomb Raider vignette! And of course I'll make a fitting stand for her too. 😉 Stay tuned!
- PS2 Save Builder 0.8x: https://www.ps2savetools.com/download/ps2-save-builder/
- PS2 Icon Importer/Exporter 0.8 plugin for Milkshape 3D: https://www.ps2savetools.com/download/milkshape-ps2-icon-importer-exporter/
- Milkshape 3D 1.8.2: http://www.milkshape3d.com/
(although in this case there are not a lot of steps, I still combined them into one image to make it easier to save)


No comments:
Post a Comment