I released my
Fortnite Tomb Raider classic Lara Croft papercraft a while ago, but I didn't do an extraction tutorial for the game model that I used as basis yet, so here it is!
(I used a tool called FModel which was updated since I used it before so I had to figure out how to do it again exactly but as you can see, it still works! 😊)
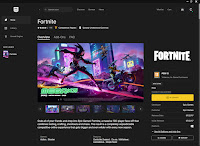
This method should work with other Fortnite characters (skins) as well, as long as you have that skin in your installed Fortnite account. Unfortunately, this means that if you didn't get the Lara skin or a particular version during the Fortnite 2021 Chapter 2 Season 6 Battle Pass (or any other one-time-only skin that you didn't get) you can not extract that particular skin, sorry...! 🙁
◾ EXTRACTING A FORTNITE MESH (Fmodel)
NOTE: You need to have the Fortnite character (skin) and any accessories that you want to extract in your installed Fortnite account!
- Download Asval's Fmodel tool from:
- Unpack and start FModel (if it tells you that you need the newest Microsoft .NET version, you will have to install it!)
NOTE: Windows Defender SmartScreen will warn you it doesn't recognize the FModel app: ONLY USE IT IF YOU TRUST Asval's FModel app!
- If YOU trust the tool, click the More info button and then choose the Run Anyway option.
- Fmodel will auto-detect your Fortnite installation folder and automatically add the necessary AES decryption keys that the tool needs to be able to look into Fortnite's game *.pak files.
NOTE: Fmodel will also automatically create a small *.ini file to remember the settings of the tool, and add an Output folder with subfolders where you unpacked the tool; remember where to find it! 😉
- Once FModel has started, open the Settings menu and on the Models tab, make sure the Level Of Detail Format is set to All Levels (that way, the tool will extract all the different detail versions that are available)
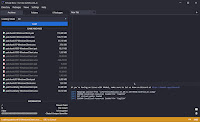
- In the Archives tab on Fmodel's main window, make sure the Loading Mode is set to All using the pulldown menu; then click the Load button and Fmodel will automatically open de Folders tab to show all the Fortnite files it has found.
- The biggest challenge in wanting to extract a specific Fortnite character is to actually find it in the game's files; luckily there are helpful lists like this Fortnite BR Skin IDs & Meshes by Blithe:
- Press Ctrl+F to bring up a search box that lets you find the skin's name that you're looking for (like Lara Croft 😀)
- For the 2021 Chapter 2 Season 6 Lara Croft skin, you will see that Lara's skin CID is: CID_A_040_Athena_Commando_F_Temple
Lara comes in three variations:
- F_Med_Temple (Lara Croft Tomb Raider 2013 reboot version)
- F_Med_Temple_Shorts (Lara Croft Tomb Raider 25th Anniversary version)
- F_Med_Temple_Throwback (Lara Croft classic version)
- Now return to the FModel tool, click the Packages menu and select Search; search for the basic Mesh name and add the word mesh at the end (to make it a little easier to find the files Mesh files which will have 3D models in them), so in this case that would be: F_Med_Temple mesh
- Fmodel will find many .uasset files, and from the file paths you can kind of see how they are set up:
- FortniteGame/Content/Characters/Player/Female/Medium/Heads/... (heads)
- FortniteGame/Content/Characters/Player/Female/Medium/Bodies/... (bodies)
- FortniteGame/Content/Accessories/FORT_BackPacks... (backpack)
- ...and so on
- From the rest of the .uasset names, you can find out which version it is, like Fortnite's standard 2013 version of Lara (with no further desciption), the 25th Anniversary (described with the word Shorts), or the classic (Throwback) version.
NOTE: To extract a Fortnite 3D mesh just to us as a basis for making it as a papercraft, you only have to look at the .uasset file that DO NOT have words like _PhysMat, _Skeleton, AnimBP or _Physics, only the (plain) .uasset files.
- Double-click one of the files that FModel found with the name of the version that you are looking for, and FModel will show a list of the corresponding .uasset files: again, look for the (basic) .uasset file that DOES NOT have any words like _AnimBP or _Skeleton or anything in front of it and then double-click that one again to open a preview of it in the 3D Viewer!
- If you confirm that it is indeed the 3D model you want to extract, simply right-click its Name on the left side of the 3D Viewer and choose the Save option.
- If all went okay, the 3D Viewer will tell you it Saved LOD 0 1 2 3 as '.psk' for 'F_Med_Temple_Throwback
NOTE: Level of Detail (LOD) 0 is the most detailed mesh level then LOD 1, then LOD 2 and LOD 3 the least detailed; if you didn't change the Level Of Detail Format in the Settings -> Models tab, it will Save the First Level Only (which is the most detailed LOD 0).
- Conveniently, if you forgot where the Output folder is , you can click the Show In Explorer button in the "Succesfully saved" dialog box to see the extracted .psk (Skeleton Mesh) files in the FModel -> Output-> Exports -> Game -> Characters -> Player -> Female -> Medium -> Bodies -> F_MED_Temple_Throwback -> Meshes folders
- If you go up a few folders, you will also find the Textures folder (as plain .PNG image files) in FModel -> Output-> Exports -> Game -> Characters -> Player -> Female -> Medium -> Bodies -> F_MED_Temple_Throwback -> NewerThrowback -> Textures that were automatically extracted with the meshes.
- In the 3D Viewer, you can see that Lara doesn't have a head yet (Fortnite character heads are saved separately in Fortnite): repeat the previous steps to extract all the meshes you need for the matching classic (Throwback) version of:
- Lara's Head
- Lara's hair and Ponytail (those are saved as Parts under Face Acc(essory)
- Lara's Backpack (pay close attentions to the seach results to find all the meshes of Lara's 3D model!)
◾ EXTRACTING A FORTNITE ANIMATION (Fmodel)
- To be able to give Lara's 3D model a nicer pose you also need to extract a matching animation.
- Go Back to Fmodel's main window and this time choose the Folders tab; use the File Tree to go to the FortniteGame -> Content -> Animation -> Game -> MainPlayer folder.
NOTE: not all the animations seemed to work correctly for me, but I had the most luck with the animations in the Emotes and Menu folders.
- In the MainPlayer -> Menu animations folder for example, make sure you look for an animation that matches the body Mesh you extracted (for Lara, That's Female -> Medium like you can see in the extracted mesh folders and filenames!)
- As you can see, I chose the Constructor -> Idle animation; right-click the animation you want to extract, and then choose the Save Animation (.psa) option.
- This time there won't be a dialog telling you the extraction was successful, so find the Output folder manually at FModel -> Output -> Exports -> Game -> Animation -> Game -> MainPlayer -> Menu -> Female -> Medium -> Constructor folder and confirm that the extracted .psa (Skeleton Animation file) was saved there.
- As you can see, extracting the files from Fortnite of a particular Fortnite character (skin) to use as a base for making a papercraft model includes a lot of searching; and even now that we have extracted all the files we need, we still need to convert them so that we can work them in a regular 3D program to prepare the model for unfolding into 2D parts we can print and cut out and glue together!
◾ COMVERTING THE FORTNITE MESHES (Blender + Blender3D Import psk psa by Befzz)
- Download Befzz's Blender3D Import psk psa addon from:
- Unpack the .ZIP file and inside you will find both a ...270.py and ...280.py file; they are for versions 2.7x or 2.8x of Blender, which you can download from the official list of old Blender versions:
NOTE: I used the 2.83 -> blender-2.83.20-windows-x64.zip version, which you can just unpack and use without having to install it! 🙂
- Start the Blender program by clicking the blender.exe file; then open the Edit menu and choose Preferences.
- Choose the Add-ons tab and click the Install an Add-On button to install Befzz's Blender3D Import psk psa version (270 or 280) that matches the Blender version you're using.
- DON'T FORGET to activate the add-on by placing a checkmark next to it and Saving the settings using the hamburger icon in the bottom left corner!
- Now when you open the File -> Import menu there will be two new options: Skeleton Mesh (.psk) and Skeleton Anim (.psa).
- Delete the standard cube that Blender always creates in a new file, and then use the File -> Import -> Skeleton Mesh (.psk) option to open Lara's body mesh .psk file AND her matching head .psk file AND her hair and ponytail .psk file AND backpack .psk file all in the SAME Blender file!
- Make sure the imported body mesh .psk files is selected (it will show an orange outline) and then use the File -> Import -> Skeleton Anim (.psa) file and import the animation .psa file that you want to use; you can then use the animation slider at the bottom to choose the pose you want to use.
- Now choose the File ->
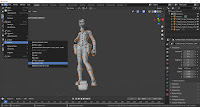
Export option to export the Fortnite model as a plain
Wavefront (.obj) model that you can open in a program like
Metasequoia (or a different 3D program that you like).
- Re-assign the .png texture images to give Lara some color again. 😀
Now you can start working on making the extracted Fortnite model into a papercraft model like I did! (or use it for a different project of course if you want to)
Have fun! 😊
Tools used:


